

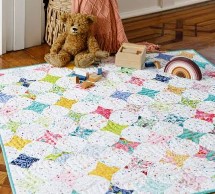
A handmade baby quilt can be practical, personal, and easy to care for when the planning happens before the first piece is cut. Whether you begin with a favorite print or a coordinated fat quarter bundle timeless treasures fabric, the best choices balance softness, durability, and the way the quilt will actually be used.
Think of the finished quilt as an item for supervised family life: awake tummy time, floor play, stroller outings, cuddling with a caregiver, or nursery display. A thoughtful plan also helps the quilt hold up through repeated washing without becoming too heavy, bulky, or difficult to repair.
Why Baby Quilts Need Practical Planning
A baby quilt often has a more active life than a decorative wall quilt. It may be spread on the floor, packed into a stroller basket, washed after spills, and eventually saved as a keepsake. Those uses affect nearly every decision, from fabric weight to the amount of quilting required.
A stroller quilt can be compact and light enough to fold easily. A quilt intended for supervised floor play may benefit from a slightly larger layout and modest padding. A keepsake can use more detailed piecing, but it should still have stable construction if it will be handled often.
Step 1: Decide How the Quilt Will Be Used
Define the project before shopping. This prevents buying fabric that does not fit the pattern, choosing a size that is inconvenient to wash, or adding features that do not suit the quilt’s purpose.
- Choose one primary use, such as tummy time, travel, cuddling, floor play, display, or keepsake storage.
- Estimate how often the quilt will need laundering.
- Consider whether it should fit only the baby stage or remain useful into the toddler years.
- Match the pattern complexity to the available time and equipment.
Step 2: Pick Fabrics That Feel Good and Wash Well
Quilting cotton is a common choice because it is widely available, easy to piece, and offered in many prints and solids. Still, softness alone is not enough. Handle the fabric, inspect the weave, and read its care information. A fabric that seems delicate, scratchy, or unusually stiff may not suit a quilt intended for frequent use.
Try to combine materials with similar washing and drying needs. Mixing fabrics that shrink or stretch differently can make the quilt top distort over time. Avoid beads, buttons, ribbons, and other detachable decorations. They add bulk and can loosen with repeated handling and laundering.
Step 3: Build a Calm, Balanced Color Palette
Start with one favorite print or focus color, then choose two or three supporting colors. Include light, medium, and dark values so individual blocks remain visible from a short distance. A soft blue, warm cream, and muted green combination can feel fresh and gentle without forcing the project into a narrow theme.
Mixing solids with small prints, dots, stripes, or simple motifs gives a place to rest at different rates. Before cutting, take a black-and-white photo of the fabrics with a phone. Without color, it is easier to see whether the values blend together too closely.
Step 4: Match Print Scale to the Pattern
Small blocks can make large motifs hard to recognize, while tiny prints may look busy when placed in a large, simple design. Use small or medium prints for small patchwork pieces, and save bold motifs for larger blocks, borders, or backing. If a print has an obvious up-and-down direction, add extra fabric and plan the cuts so the design is oriented consistently.
Step 5: Choose a Manageable Quilt Size
There is no single correct baby-quilt measurement. Small quilts are convenient for travel and supervised cuddling. Medium quilts provide more room and can stay useful longer. Larger versions may be harder to baste, quilt, wash, and dry on home equipment.
Size Planning Checklist
- Write down the desired finished width and length.
- Add extra fabric around the quilt top for quilting and trimming.
- Check the usable width of the chosen backing fabric.
- Make sure the batting extends beyond every edge of the quilt top.
Step 6: Select Batting and Backing for Comfort
Low-loft batting creates a flatter, more flexible quilt that is easier to fold and quilt through. Medium-loft batting adds more dimension but can make a small project feel thicker. More loft is not automatically better. The right choice depends on the desired drape, the quilt’s use, and the sewing machine’s capabilities.
Choose a backing that feels smooth and can be laundered in the same way as the quilt top. A simple solid or small-scale print can also make future repairs easier because loose stitches and worn areas are simpler to spot.
Step 7: Prepare Fabric Before Cutting
Read care labels, then decide whether to prewash based on the fabric and the finished-care plan. For dark or highly saturated colors, test a small swatch first. Washing, drying, and pressing fabric as you expect to care for the finished quilt can reveal shrinkage, dye transfer, distortion, or an unwanted change in texture before piecing begins. Square the fabric before measuring and cutting for more accurate blocks.
Step 8: Keep Construction Simple and Secure
A straightforward pattern is often the strongest choice for a first baby quilt. Large squares, strip piecing, simple patchwork, and uncomplicated borders can look polished while leaving time for careful finishing. Sew consistent seams, quilt densely enough to suit the batting instructions, and apply binding firmly around every edge. Before gifting, trim stray threads and inspect both sides for missed stitches, gaps, or weak spots.
Step 9: Plan for Safe, Supervised Use
A handmade quilt is not approved as loose bedding for infant sleep. The AAP safe-sleep recommendations advise keeping quilts, blankets, pillows, and other loose items out of a baby’s crib, bassinet, or play yard. Use the quilt when a caregiver is awake and supervising, then move it away when the baby is placed down to sleep.
Caregivers can also follow the CPSC guidance for clear infant sleep spaces, which emphasizes a firm sleep surface with only a fitted sheet. Including a brief care and use note with a gifted quilt can help make its intended role clear.
Step 10: Wash and Store the Finished Quilt
Follow the care needs of the materials used, rather than relying on a generic routine. Wash the completed quilt as planned before regular use, dry it thoroughly, and store it in a clean, dry, breathable location. Check it periodically for loose threads, weakened seams, or damaged binding, especially after frequent washing.
Common Planning Mistakes to Avoid
- Buying fabric before choosing the pattern and finished size.
- Using many colors without enough light-to-dark contrast.
- Ignoring direction, care, and the user.
- Combining materials to clarify and respond to different laundering.
- Choosing batting that makes the quilt overly thick or stiff.
- Skipping color testing when using deep, saturated fabrics.
- Adding decorations that may loosen over time.
-
Using the quilt as loose bedding in an infant sleep area.
Final Project Checklist
- The quilt has a clear, supervised purpose.
- The fabrics are comfortable, durable, and machine-washable.
- The colors and print scales work together.
- The batting and backing match the desired weight and care routine.
- The seams, quilting, and binding are secure.
- The quilt has been washed, inspected, and stored properly.
A successful handmade baby quilt does not require an elaborate pattern or expensive materials. It requires purposeful choices, washable construction, comfortable fabrics, and safe expectations for its use. With those details in place, the finished quilt can become a well-loved part of supervised play and family life.