

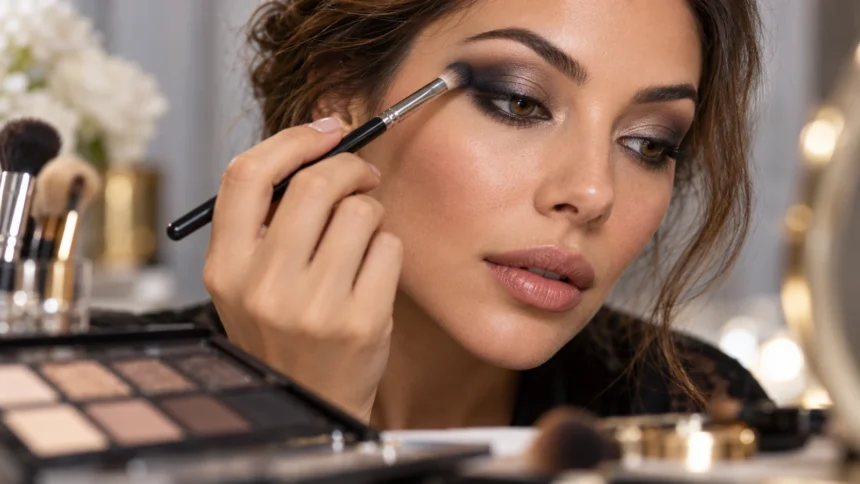
Gather Your Smokey Eye Makeup and Tools
A smooth smokey eye starts with a few basic tools: eyeshadow in light, medium, and deep shades, a blending brush, a smaller detail brush, eyeliner, and mascara. Choose colors that work well together, such as taupe, charcoal, and black, or brown, bronze, and deep chocolate. A mirror and good lighting make it easier to see where each shade is going.
You can use matte shadows for definition and a little shimmer for the lid if you like. Beginners often find a neutral palette easier to blend because the shades transition naturally. Check that your makeup is intended for use around the eyes, and avoid using craft glitter or products not labeled for the eye area.
Keep a clean tissue or cotton swab nearby to tidy small mistakes, and wash your brushes regularly. Clean tools help colors blend more evenly and reduce the chance of transferring old makeup or debris near your eyes. If you wear contact lenses, put them in before applying eye makeup and take care to keep powders away from your lenses.
Prep Your Eyelids Before Applying Shadow
Start with clean, dry eyelids so eyeshadow has a smooth surface to grip. If you wear moisturizer around your eyes, give it time to absorb before applying makeup. Too much moisture or leftover oil can make shadow crease or slide, so gently blot the lids with a tissue if they feel slick.
Apply a thin layer of eyeshadow primer or concealer to help even out the skin tone and improve wear. Blend it from the lash line toward the brow bone, then set it lightly with a skin-toned powder or pale matte shadow. Use only a small amount; a thick, tacky base can make blending harder.
If you plan to apply dark shadow, consider doing your eye makeup before foundation or placing a tissue beneath your eye. Dark powder can fall onto the cheeks as you blend and leave smudges. Once the eye look is finished, you can brush away any fallout and apply complexion makeup for a cleaner result.
Choose Shades That Blend Well Together
A classic smokey eye uses a gradual shift from lighter color near the inner eye to darker color near the outer corner and lash line. Pick a light transition shade, a medium shade for depth, and a darker shade for definition. These colors do not need to be black; a brown smokey eye can look soft and wearable.
For a simple neutral combination, use beige or taupe as the transition, medium brown across the crease, and deep brown or charcoal at the outer corner. If you prefer a more dramatic look, add black in small amounts near the lashes. Keeping the darkest color concentrated in one area makes the eye makeup easier to control.
Think about how the shades look together on your skin rather than choosing colors only from a palette. Test a small amount on the back of your hand if you are unsure how intense a shade will appear. Start with less product than you think you need, since it is easier to build color gradually than to remove excess.
Apply a Transition Shade to the Crease
Dip a fluffy blending brush into your light or medium transition shade and tap off the extra powder. Sweep it through the crease using small back-and-forth motions, keeping the color soft and diffused. This first layer creates a guide for the deeper shades and helps the smokey eye blend rather than look like separate patches.
Keep your eyes relaxed and look straight into the mirror as you apply the transition color. If your eyelids fold over the crease, blend slightly above the natural fold so the shade remains visible when your eyes are open. Use a light hand and add color in thin layers instead of pressing the brush firmly against the skin.
Blend the edges with small circular motions, especially toward the brow bone and outer corner. The color should fade gradually rather than stop in a sharp line. If it reaches too high, use a clean brush with a little skin-toned shadow to soften the edge without adding more depth.
Build Depth on the Outer Corner
Use a smaller blending brush to place the medium shade on the outer third of the eyelid. Press the color close to the lash line and into the outer crease, then blend it gently toward the center. This creates dimension while leaving the inner portion of the lid lighter and brighter.
Add the darkest shade in small amounts at the outer corner, forming a soft V shape along the outer lash line and crease. Keep most of the pigment near the lashes, where it creates definition, and blend the upper edge into the medium shade. Repeating this step lightly gives you control over the final intensity.
Step back from the mirror every so often and check both eyes together. Smokey eye makeup can look different from one side to the other while you are working close up. If one outer corner appears darker or wider, use a clean blending brush to soften it or add a little of the medium shade to balance the shape.
Blend the Lid for a Seamless Smokey Effect
After building the outer corner, use a flat brush or fingertip to place a medium shade over the center of the lid. Pressing the color onto the eyelid can make it appear richer than sweeping it on. Keep the shade below the crease, then blend its edges gently into the transition and darker outer-corner colors.
For more dimension, use a lighter matte shade or a small amount of shimmer on the inner or center lid. Keep shimmer away from the waterline, and apply it with a fingertip or flat brush for a more controlled finish. A soft highlight can brighten the eye, while a darker center can make the smokey effect more dramatic.
Blend where the colors meet without sweeping away all the definition. Use a clean brush and short, gentle strokes along the edges between shades. If everything begins to look muddy, pause and wipe the brush clean before blending again; too many colors mixed together can lose their contrast.
Define the Upper Lash Line With Eyeliner
Choose a pencil, gel, or liquid eyeliner depending on the finish you want. A soft pencil is often easiest for a blended smokey eye because it can be smudged before it sets. Apply it close to the upper lashes, filling small gaps between the lashes for definition without drawing a thick line too far above them.
Use a small smudging brush to soften the eyeliner into the dark eyeshadow. Work quickly if your pencil formula sets fast, and keep the smudge close to the lash line. You can add a little dark shadow over the liner to set it and create a smooth transition from the lashes into the lid color.
A small wing can add shape, but it is optional. If you add one, keep it short and follow the angle of your lower lash line toward the end of your brow. Avoid pulling the eyelid tightly while applying liner, since the line may look different once the skin returns to its natural position.
Add Shadow and Liner Along the Lower Lash Line
Use a small pencil brush to sweep the transition or medium shade along the lower lash line. Keep the color close to the lashes and blend it lightly, connecting it to the outer corner of the upper shadow. This step balances the look and makes the eyes appear framed without requiring a thick line underneath.
For a more dramatic smokey eye, add a small amount of the darkest shadow to the outer half of the lower lash line. Blend carefully so the color remains soft and does not form a harsh stripe. If you have smaller eyes or prefer a lighter effect, use only the transition shade beneath the lashes.
Apply eyeliner along the lower lash line only if it feels comfortable and suits the look you want. Avoid putting products on the waterline if they irritate your eyes or if the product is not labeled for that area. Keep your hand steady, and use a clean brush to soften any line that looks too sharp.
Finish With Mascara and Clean-Up
Before applying mascara, check the shadow in natural or bright, even lighting. Use a clean blending brush to soften any harsh edges, and remove fallout from your cheeks with a clean, dry brush. If dark powder leaves a mark, gently lift it away with a cotton swab rather than rubbing it across your skin.
Curl your lashes gently before applying mascara if you use an eyelash curler. Place the curler near the base of clean, dry lashes and squeeze carefully without pulling. Apply one or two light coats of mascara from the roots toward the tips, letting each layer dry slightly to reduce clumps.
For a polished finish, tidy the brow area and add a subtle highlight beneath the brow if you want. Keep the highlight soft so it does not compete with the smokey eye. If the look feels too intense, soften the lower lash line or blend a small amount of your transition shade over the darkest edges.
Adjust the Smokey Eye for Your Eye Shape and Occasion
A smokey eye can be adapted to suit different eye shapes and comfort levels. If your crease is less visible, place the transition shade slightly above it so the color shows when your eyes are open. For downturned eyes, concentrating depth at the outer upper corner can help lift the overall appearance.
For daytime, use brown, taupe, or soft plum and keep the darkest shade close to the lashes. A light wash of color, softly blended edges, and one coat of mascara can create a subtle smokey effect. For evening, deepen the outer corner, add more eyeliner, or use shimmer on the lid while keeping the blending gradual.
You can also change the mood by switching the color family. Bronze and warm brown create a softer look, while charcoal and black feel more dramatic; plum and deep green offer color without relying on classic black. Whichever shades you choose, build them slowly and compare both eyes in the lighting where you will wear the makeup.
Conclusion
A smokey eye comes together through gradual layers, careful placement, and soft blending. Begin with a prepared lid, add a transition shade, build depth at the outer corner, and keep the darkest color near the lashes. Working in small amounts helps you create definition without making the makeup difficult to correct.
You can make the look subtle or dramatic by changing the shades, eyeliner, and amount of shadow. Neutral browns are a comfortable starting point, while charcoal, plum, or bronze can add a different feel. Adjust the placement to suit your eye shape and the occasion.
Take your time, use clean tools, and check the result with your eyes open as well as closed. With practice, the steps become easier to follow and customize. A well-blended smokey eye does not have to be perfect or complicated; it should feel comfortable and look like a style you enjoy wearing.
FAQs
What do I need for a basic smokey eye?
Use three coordinated eyeshadow shades, a blending brush, a smaller detail brush, eyeliner, and mascara. Primer can help the shadow stay in place, but you can create the look without it.
How do I stop my smokey eye from looking muddy?
Use fewer shades, apply them gradually, and clean your brush between colors. Keep the darkest shadow near the lashes and outer corner, then blend only where the colors meet.
Can beginners do a smokey eye?
Yes. Start with brown or taupe shades and a soft pencil liner, which is easy to smudge. Apply small amounts of shadow and check the result as you build the color.
Should I apply eyeliner before or after eyeshadow?
Apply eyeshadow first, then add eyeliner close to the lashes. Smudge pencil liner into the shadow for a softer effect, or leave it sharper for more definition.
How can I make a smokey eye look less dramatic?
Choose soft brown or taupe instead of black, use less shadow, and keep the darker color close to the upper lash line. A lighter lower lash line also keeps the look more subtle.